
Common Finishing Mistakes
_
Top Orthodontic Finishing Mistakes to Avoid | A Guide by Dr. Jeffery Taylor
The Finishing Stage of orthodontics is a fine balance of both art and science, and can often be one of the most stressful aspects of an orthodontic case. Proper finishing techniques are critical to ensuring well-balanced occlusion and long-term stability.
Top 7 Case Finishing Mistakes to Avoid
1. Beginning the finishing stage prematurely
Your case should have all the basic tenants of the mechanics stage completed before you begin the finishing stage. Some things to achieve before progressing to the finishing stage are:
1. Class I cuspid
2. Spaces closed
3. Level curve of Spee
4. Proper overjet
5. Proper overbite
6. No rotations
It is not wise to start finishing until you accomplished the above items, which are roughly Andrews Six Keys to Occlusion:
Don't make this mistake:
Finishing was started before Class I was obtained on the left:

Don't make this mistake:
Finishing was started before the upper space was closed.
Note the parallelism problem in the 32 as well.
2. Expecting the custom (finishing) wire to correct minor rotations
Any rotations should have been corrected in the round niti phase since stainless steel wires do NOT correct rotations well. This isn’t due to a lack of skill of the operator, it is a problem related to the properties of the arch wire itself, regardless if you are using 018ss or 18x25 heat activated niti. Remember, if the bracket is straight to the wire but the tooth is not, it is best to change the bracket and then derotate.
Many times, the cuspid (upper or lower) may become rotated during the mechanics phase because it was not tied in properly during the retraction phase and/or extraction space closure. The ideal way to correct this is to return to the round niti and correct all rotations prior to starting finishing.

Don't make the mistake of rushing!
Make sure to correct this rotation before you start finishing
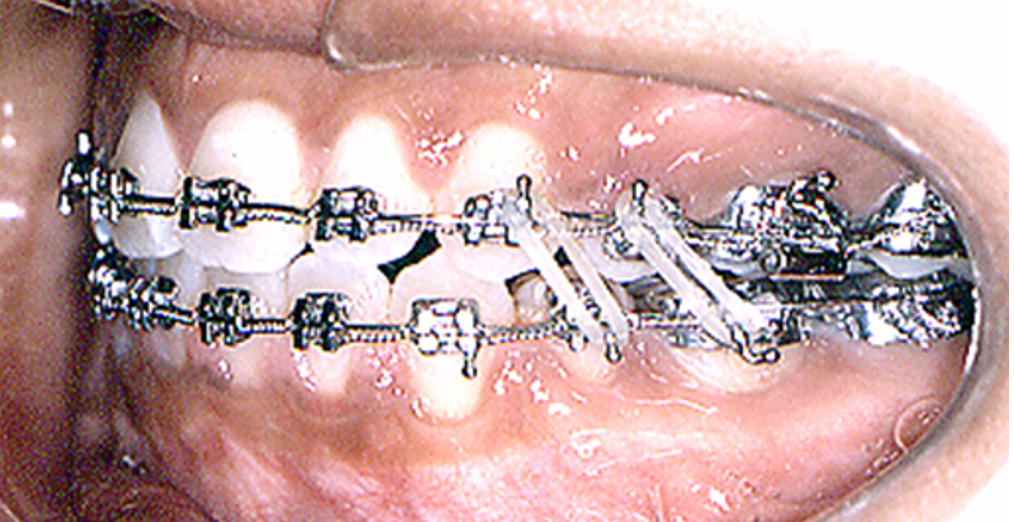
3. Failure to address the upper and/or lower 7s before you start wire bending
If the upper or lower 7s are NOT in alignment, we recommend you band and align them BEFORE you make any finishing bends.
In this example, the 7 was banded and will need to be aligned on a round niti since there are positional errors in all three planes of space.

4. Failure to make the wire return back to the same plane on a simple first order bend (up/down, in/out type bend)
Creating successful first order bends comes with experience. To minimize unwanted error, use the 1mm step pliers to make these simple bends. In the example below, you see a step down for the upper 5 and the plane for the 4 and the 6 are at different levels, creating a vertical change in the arch when none was desired.

5. Failure to make the bends be of an appropriate size
It is quite common in their first few orthodontic cases that doctors tend to make the bends too large when using the light wire plier. When this happens, the wire cannot be inserted, or the wire will bend and not deflect, or the bracket will debond. It takes practice to overcome this.
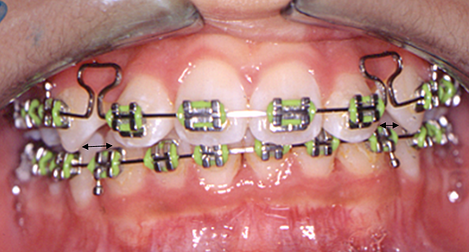
6. Failure to change archwire shapes to make the upper and lower fit together more ideally
Frequently, the upper arch will expand more than the lower arch which makes the incisors end to end and/or the upper space hard to close. If you’re experiencing these issues, you might want to consider changing the shape of the wires.
In the example below, the case is not yet in the finishing stage, however you can see that the upper is too wide by looking at the upper to lower cuspid relationship.
Here is the same case after tapering the upper and expanding the lower at the finishing wire phase of treatment. Note the cuspid relationship at this phase:

7. Entering the finishing stage without a plan
Without a finishing treatment plan, you will lack the precision and efficiency needed to finish the case correctly. With a bit of time spent on pre-planning, you’ll be able to:
· Reposition brackets to correct rotation and long axis errors
· Realign as needed on round or rectangular niti wires
· Maximize efficiency by placing 018ss and making ALL the bends needed at the same appointment.
· Maintain proper wire length by making your wire bends in a pre-planned order
· Ensure you address the 7s as needed
· Reduce your stress in the clinical setting
· Obtain the best finish possible for your patient